
spring-boot-2.0.3不一樣系列之源碼篇 - run方法(三)之createApplicationContext,絕對有值得你看的地方
前言
此系列是針對springboot的啟動,旨在於和大家一起來看看springboot啟動的過程中到底做了一些什麽事。如果大家對springboot的源碼有所研究,可以挑些自己感興趣或者對自己有幫助的看;但是如果大家沒有研究過springboot的源碼,不知道springboot在啟動過程中做了些什麽,那麽我建議大家從頭開始一篇一篇按順序讀該系列,不至於從中途插入,看的有些懵懂。當然,文中講的不對的地方也歡迎大家指出,有待改善的地方也希望大家不吝賜教。老規矩:一周至少一更,中途會不定期的更新一些其他的博客,可能是springboot的源碼,也可能是其他的源碼解析,也有可能是其他的。
路漫漫其修遠兮,吾將上下而求索!
github:https://github.com/youzhibing
碼雲(gitee):https://gitee.com/youzhibing
前情回顧
大家還記得上篇博文講了什麽嗎,或者說大家知道上篇博文講了什麽嗎。這裏幫大家做個簡單回顧,主要做了兩件事
1、加載外部化配置的資源到environment
包括命令行參數、servletConfigInitParams、servletContextInitParams、systemProperties、sytemEnvironment、random、application.yml(.yaml/.xml/.properties),如下所示

2、廣播ApplicationEnvironmentPreparedEvent事件,觸發相應的監聽器
ConfigFileApplicationListener
添加名叫random的RandomValuePropertySource到environment
添加名叫applicationConfig:[classpath:/application.yml]的OriginTrackedMapPropertySource到environment
LoggingApplicationListener
初始化日誌系統
createApplicationContext
先欣賞下我們的戰績,看看我們對run方法完成了多少的源碼解讀


/**
 * Run the Spring application, creating and refreshing a new
 * {@link ApplicationContext}.
 * @param args the application arguments (usually passed from a Java main method)
 * @return a running {@link ApplicationContext}
 */
public ConfigurableApplicationContext run(String... args) {
    // 秒表,用於記錄啟動時間;記錄每個任務的時間,最後會輸出每個任務的總費時
    StopWatch stopWatch = new StopWatch();
    stopWatch.start();
    // spring應用上下文,也就是我們所說的spring根容器
    ConfigurableApplicationContext context = null;
    // 自定義SpringApplication啟動錯誤的回調接口
    Collection<SpringBootExceptionReporter> exceptionReporters = new ArrayList<>();
    // 設置jdk系統屬性java.awt.headless,默認情況為true即開啟
    configureHeadlessProperty();
    // 獲取啟動時監聽器(EventPublishingRunListener實例)
    SpringApplicationRunListeners listeners = getRunListeners(args)
    // 觸發ApplicationStartingEvent事件,啟動監聽器會被調用,一共5個監聽器被調用,但只有兩個監聽器在此時做了事
    listeners.starting();
    try {
        // 參數封裝,也就是在命令行下啟動應用帶的參數,如--server.port=9000
        ApplicationArguments applicationArguments = new DefaultApplicationArguments(
                args);
        // 準備環境:1、加載外部化配置的資源到environment;2、觸發ApplicationEnvironmentPreparedEvent事件
        ConfigurableEnvironment environment = prepareEnvironment(listeners,
                applicationArguments);
        // 配置spring.beaninfo.ignore,並添加到名叫systemProperties的PropertySource中;默認為true即開啟
        configureIgnoreBeanInfo(environment);
        // 打印banner圖
        Banner printedBanner = printBanner(environment);
        // 創建應用上下文,這是本文重點
        context = createApplicationContext();
        exceptionReporters = getSpringFactoriesInstances(
                SpringBootExceptionReporter.class,
                new Class[] { ConfigurableApplicationContext.class }, context);
        prepareContext(context, environment, listeners, applicationArguments,
                printedBanner);
        refreshContext(context);
        afterRefresh(context, applicationArguments);
        stopWatch.stop();
        if (this.logStartupInfo) {
            new StartupInfoLogger(this.mainApplicationClass)
                    .logStarted(getApplicationLog(), stopWatch);
        }
        listeners.started(context);
        callRunners(context, applicationArguments);
    }
    catch (Throwable ex) {
        handleRunFailure(context, ex, exceptionReporters, listeners);
        throw new IllegalStateException(ex);
    }

    try {
        listeners.running(context);
    }
    catch (Throwable ex) {
        handleRunFailure(context, ex, exceptionReporters, null);
        throw new IllegalStateException(ex);
    }
    return context;
}
View Code
前菜
configureIgnoreBeanInfo(environment);
private void configureIgnoreBeanInfo(ConfigurableEnvironment environment) {
    if (System.getProperty(
            CachedIntrospectionResults.IGNORE_BEANINFO_PROPERTY_NAME) == null) {
        Boolean ignore = environment.getProperty("spring.beaninfo.ignore",
                Boolean.class, Boolean.TRUE);
        System.setProperty(CachedIntrospectionResults.IGNORE_BEANINFO_PROPERTY_NAME,
                ignore.toString());
    }
}
View Code
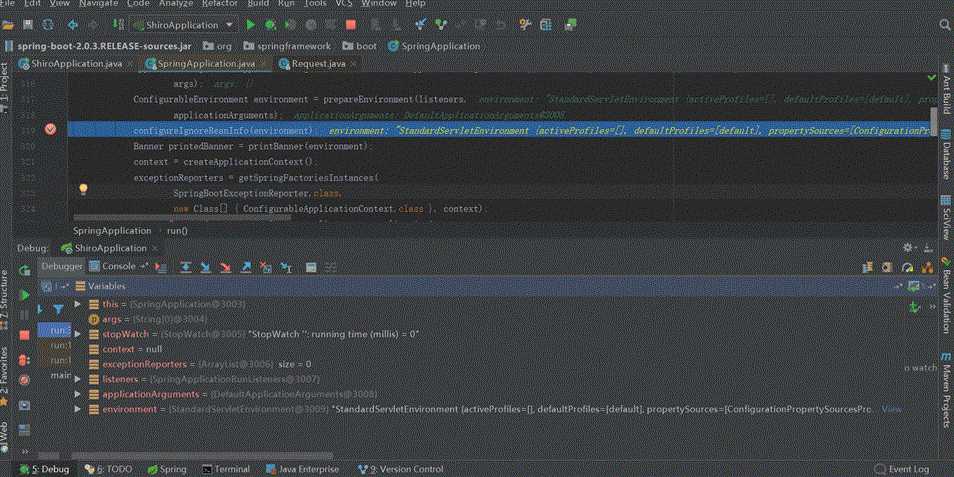
配置spring.beaninfo.ignore,並添加到名叫systemProperties的PropertySource中,默認為true即開啟,如上圖所示。至於spring.beaninfo.ignore配置這個有什麽用,什麽時候用,暫時還沒體現,後續應該會有所體現,我們暫時先將其當做一個疑問放著。
printBanner(environment);
private Banner printBanner(ConfigurableEnvironment environment) {
    if (this.bannerMode == Banner.Mode.OFF) {
        return null;
    }
    ResourceLoader resourceLoader = (this.resourceLoader != null ? this.resourceLoader
            : new DefaultResourceLoader(getClassLoader()));
    SpringApplicationBannerPrinter bannerPrinter = new SpringApplicationBannerPrinter(
            resourceLoader, this.banner);
    if (this.bannerMode == Mode.LOG) {
        return bannerPrinter.print(environment, this.mainApplicationClass, logger);
    }
    return bannerPrinter.print(environment, this.mainApplicationClass, System.out);
}
View Code
打印banner圖,就是下面這個圖

並返回Banner對象,後續還會用到。
正餐
通過前面兩道前菜,我相信我們已經胃口大開了,那麽請開始我們的正餐 - createApplicationContext
源代碼
/**
 * Strategy method used to create the {@link ApplicationContext}. By default this
 * method will respect any explicitly set application context or application context
 * class before falling back to a suitable default.
 * @return the application context (not yet refreshed)
 * @see #setApplicationContextClass(Class)
 */
protected ConfigurableApplicationContext createApplicationContext() {
    Class<?> contextClass = this.applicationContextClass;
    if (contextClass == null) {
        try {
            switch (this.webApplicationType) {
            case SERVLET:
                contextClass = Class.forName(DEFAULT_WEB_CONTEXT_CLASS);
                break;
            case REACTIVE:
                contextClass = Class.forName(DEFAULT_REACTIVE_WEB_CONTEXT_CLASS);
                break;
            default:
                contextClass = Class.forName(DEFAULT_CONTEXT_CLASS);
            }
        }
        catch (ClassNotFoundException ex) {
            throw new IllegalStateException(
                    "Unable create a default ApplicationContext, "
                            + "please specify an ApplicationContextClass",
                    ex);
        }
    }
    return (ConfigurableApplicationContext) BeanUtils.instantiateClass(contextClass);
}
View Code
根據SpringApplication的webApplicationType來實例化對應的上下文;如果webApplicationType的值是SERVLET,那麽實例化AnnotationConfigServletWebServerApplicationContext,如果是REACTIVE則實例化AnnotationConfigReactiveWebServerApplicationContext(響應式編程,後續再看),如果既不是SERVLET、也不是REACTIVE,那麽則是默認情況(也就是我們所說的非web引用),實例化AnnotationConfigApplicationContext。還記得webApplicationType的值是怎麽獲取的嗎,請點這裏。很顯然我們目前的應用類型是SERVLET,那麽實例化AnnotationConfigServletWebServerApplicationContext。

利用反射調用AnnotationConfigServletWebServerApplicationContext的構造方法進行實例化,期間有對構造方法進行可訪問性設置,同時還進行了Kotlin的校驗。我們目前應用中不涉及Kotlin,先放著不用看。
AnnotationConfigServletWebServerApplicationContext類圖
 AnnotationConfigServletWebServerApplicationContext父級類
從類圖中我們可知,類結構比較深,我們從上往下來看各個父類的構造方法(實現的接口先不看),看看構造方法體裏面所做的事。
DefaultResourceLoader,默認資源加載器
獲取默認的類加載器,獲取的是當前線程的上下文類加載器。
AbstractApplicationContext,抽象應用上下文
初始化屬性resourcePatternResolver,也就是資源模式解析器;實際類型是PathMatchingResourcePatternResolver,它是基於模式匹配的,默認使用AntPathMatcher進行路徑匹配,它除了支持ResourceLoader支持的前綴外,還額外支持“classpath*:”用於加載所有匹配的類路徑Resource。
另外beanFactoryPostProcessors屬性此時已經初始化了,後續肯定會用到,大家註意下。
GenericApplicationContext,通用應用上下文
初始化屬性beanFactory,其類型是DefaultListableBeanFactory,DefaultListableBeanFactory類圖如下

DefaultListableBeanFactory的父級類
我們根據上圖,從上往下讀
SimpleAliasRegistry,簡單別名註冊器
沒有明確的定義構造方法,也就是只有默認的無參構造方法,我們可認為只是實例化了自己。
DefaultSingletonBeanRegistry,默認單例bean註冊器,用於註冊共享的單例bean
沒有明確的定義構造方法,也就是只有默認的無參構造方法,我們可認為只是實例化了自己。
FactoryBeanRegistrySupport,工廠bean註冊器支持,用於註冊工廠bean單例
沒有明確的定義構造方法,也就是只有默認的無參構造方法,我們可認為只是實例化了自己。
AbstractBeanFactory,抽象bean工廠
無參構造方法體內為空,我們可認為只是實例化了自己。
AbstractAutowireCapableBeanFactory,抽象的有自動裝配裝配能力的bean工廠,賦予了自動裝配功能
該類提供bean創建(具有構造函數解析),屬性填充,接線(包括自動裝配)和初始化。 處理運行時bean引用,解析托管集合,調用初始化方法等。支持自動裝配構造函數,按名稱的屬性和按類型的屬性。
無參構造方法中,添加了三個非自動裝配的接口:BeanNameAware、BeanFactoryAware和BeanClassLoaderAware。
DefaultListableBeanFactory,ListableBeanFactory的默認實現
該類用於註冊所有bean定義、也可用作獨立的bean工廠,當然也可以用作我們自定義bean工廠的父類。
無參構造方法中也只是調用了super(),我們可認為只是實例化了自己。
GenericWebApplicationContext,通用web應用上下文,在GenericApplicationContext基礎上增加web支持
無參構造方法中,只是調用了super(),我們可認為只是實例化了自己。
ServletWebServerApplicationContext,servlet web服務應用上下文,能夠從自身引導,創建,初始化和運行WebServer
無參構造方法中是空內容,我們可認為只是實例化了自己。
DefaultListableBeanFactory類圖中,有很多類的屬性值得我們留意,比如SimpleAliasRegistry的aliasMap、DefaultSingletonBeanRegistry的singletonObjects、singletonFactories和earlySingletonObjects、FactoryBeanRegistrySupport的factoryBeanObjectCache、AbstractBeanFactory的beanPostProcessors、AbstractAutowireCapableBeanFactory的ignoredDependencyInterfaces、DefaultListableBeanFactory中的屬性beanDefinitionMap和beanDefinitionNames。
AnnotationConfigServletWebServerApplicationContext類圖中,也有很多類的屬性值得我們留意,比如AbstractApplicationContext的beanFactoryPostProcessors、GenericApplicationContext的beanFactory(就是DefaultListableBeanFactory)、GenericWebApplicationContext的servletContext、ServletWebServerApplicationContext的webServer和servletConfig。
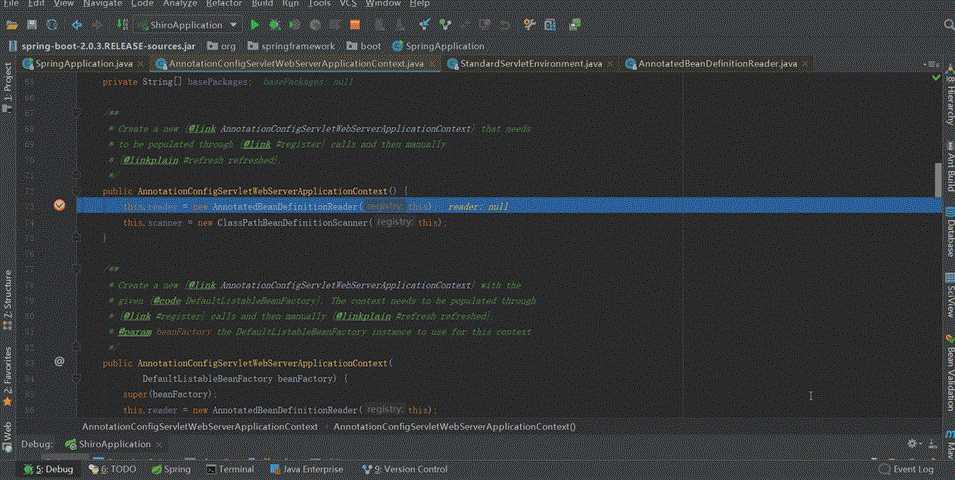
AnnotationConfigServletWebServerApplicationContext構造方法
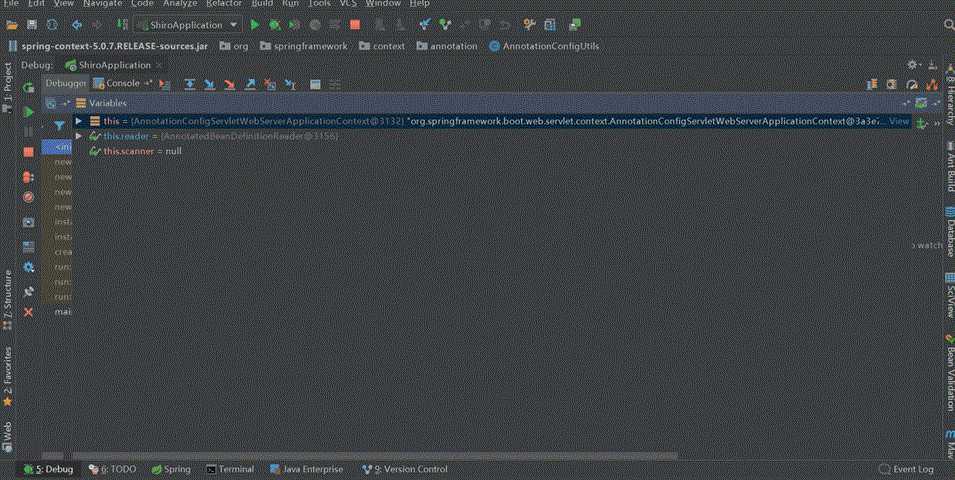
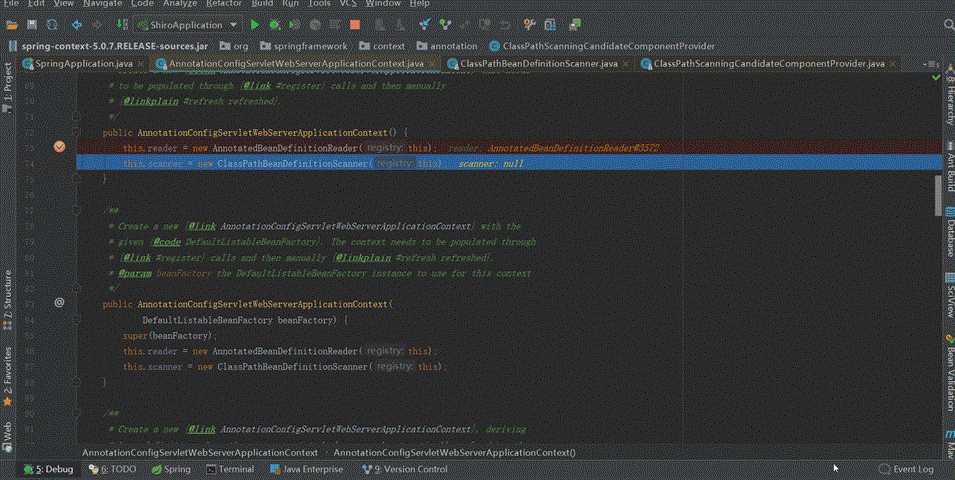
/**
 * Create a new {@link AnnotationConfigServletWebServerApplicationContext} that needs
 * to be populated through {@link #register} calls and then manually
 * {@linkplain #refresh refreshed}.
 */
public AnnotationConfigServletWebServerApplicationContext() {
    this.reader = new AnnotatedBeanDefinitionReader(this);        // 實例化註解bean定義讀取器
    this.scanner = new ClassPathBeanDefinitionScanner(this);    // 實例化類路徑bean定義掃描器
}
構造方法中的內容也比較簡單,就是實例化兩個bean,並賦值給自己的屬性。我們接著往下看,AnnotatedBeanDefinitionReader和ClassPathBeanDefinitionScanner到底是什麽,構造方法中到底做了什麽?
AnnotatedBeanDefinitionReader
從類註釋上來看,作用就是用於編程式註解bean的註冊,例如我們平時用到的@Component,還有@Configuration類下的@Bean等。
構造方法中調用getOrCreateEnvironment(registry)來獲取environment;大家調試跟進的話會發現,此處新實例化了StandardServletEnvironment,大家還記得SpringApplication中的environment嗎,它也是StandardServletEnvironment實例,那麽此處為什麽還要新new一個StandardServletEnvironment呢,總結中給大家答案。
屬性ConditionEvaluator conditionEvaluator,大家留意下屬性類型ConditionEvaluator ,通常用來評估@Conditional。
另外還註冊了註解配置處理器:AnnotationAwareOrderComparator、ContextAnnotationAutowireCandidateResolver、ConfigurationClassPostProcessor、AutowiredAnnotationBeanPostProcessor、RequiredAnnotationBeanPostProcessor、CommonAnnotationBeanPostProcessor、EventListenerMethodProcessor、DefaultEventListenerFactory。
此時beanFactory屬性如下
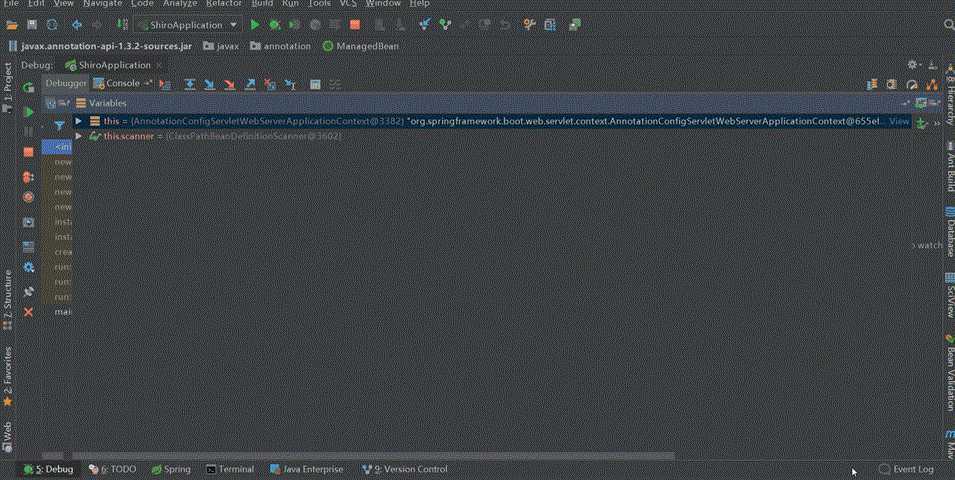
ClassPathBeanDefinitionScanner
從類註釋上來看,就是一個bean定義掃描器,用來掃描類路徑下的bean侯選者。
其中registerDefaultFilters,註冊了兩個AnnotationTypeFilter:一個針對@Component,一個針對@ManagedBean
此時beanFactory屬性如下
此時雖然已經創建了應用上下文,但還只是具有一個骨架(填充了少部分內容),後續會往這個骨架上填充器官和肉體,來構成一個完整的應用。那往哪填充呢?就是我們上面提的到個各個類中的屬性。
甜點
上面講了那麽多,相信大家此時有點蒙,看似一個簡單的createApplicationContext,卻引發了一系列類的實例化;大家主要關註上述兩個類圖中父級類,對每個類進行一遍通讀,大致了解下每個類中有些什麽屬性。後續肯定會對這些屬性進行填充,並利用這些屬性完成我們的應用。
有時候,不是對手有多強大,只是我們不敢去嘗試;勇敢踏出第一步,你會發現自己比想象中更優秀!誠如海因斯第一次跑進人類10s大關時所說:上帝啊,原來那扇門是虛掩著的!
總結
1、文中疑問
AnnotatedBeanDefinitionReader中為什麽還要實例化一個StandardServletEnvironment?
我們可以把這個問題變一下,為什麽不把SpringApplication中的environment直接註入到AnnotatedBeanDefinitionReader,而是要在AnnotatedBeanDefinitionReader中實例化新的StandardServletEnvironment?
我們看下類所在的包可知,SpringApplication是Spring boot的特有的類,而AnnotatedBeanDefinitionReader是spring中的類,我們知道spring boot依賴spring,但spring不依賴spring boot,那麽我們在spring中能用spring boot特有的內容嗎?我們可能又有另外的疑問了,那為什麽不先實例化spring中的StandardServletEnvironment,然後將它賦值給SpringApplication,就目前而言,我也不知道,不過在後續應該能找到答案,我們暫且先當一個疑問留著。
2、AnnotatedBeanDefinitionReader與ClassPathBeanDefinitionScanner
前者是註解bean定義讀取器,用於編程式註解bean的註冊;後者是類路徑bean定義掃描器,用於檢測類路徑上的bean候選者。
AnnotatedBeanDefinitionReade用來加載class類型的配置,在它初始化的時候,會預先註冊一些BeanPostProcessor和BeanFactoryPostProcessor,這些處理器會在接下來的spring初始化流程中被調用。ClassPathBeanDefinitionScanner是一個掃描指定類路徑中註解Bean定義的掃描器,在它初始化的時候,會初始化一些需要被掃描的註解。
3、BeanDefinition
Spring容器裏通過BeanDefinition對象來表示Bean,BeanDefinition描述了Bean的配置信息;根據BeanDefinition實例化bean,並放到bean緩存中。
4、spring bean配置方式
有三種:基於XML的配置方式 、基於註解的配置方式和基於Java類的配置方式。
基於XML,這個我們都很熟,類似:<bean id="xx" class="xxx" />
基於註解,這個我們也用的比較多,入@Component、@Service、@Controller等
基於java類,spring的推薦配置方式,@Configuration配合@Bean
5、createApplicationContext到底做了什麽
說的簡單點:創建web應用上下文,對其部分屬性:reader、scanner、beanFactory進行了實例化;reader中實例化了屬性conditionEvaluator;scanner中添加了兩個AnnotationTypeFilter:一個針對@Component,一個針對@ManagedBean;beanFactory中註冊了8個註解配置處理器。這些就目前而言,可能沒提現其作用,後續肯定會用到的。
參考
Spring Boot Reference Guide
Spring boot 源碼
spring-boot-2.0.3不一樣系列之源碼篇 - run方法(三)之createApplicationContext,絕對有值得你看的地方